
在上一章中,我们详细介绍了 RKE2 的核心概念与部署流程。为进一步提升集群可视化与操控效率,本章将带您搭建并初步体验一个适用于学习和开发的 Kuboard 管理面板和适用于生产环境的rancher管理面板,让您通过直观的图形界面实时监控集群状态、管理工作负载,并快速上手常用运维操作。
1.Kuboard(适用于开发与测试)
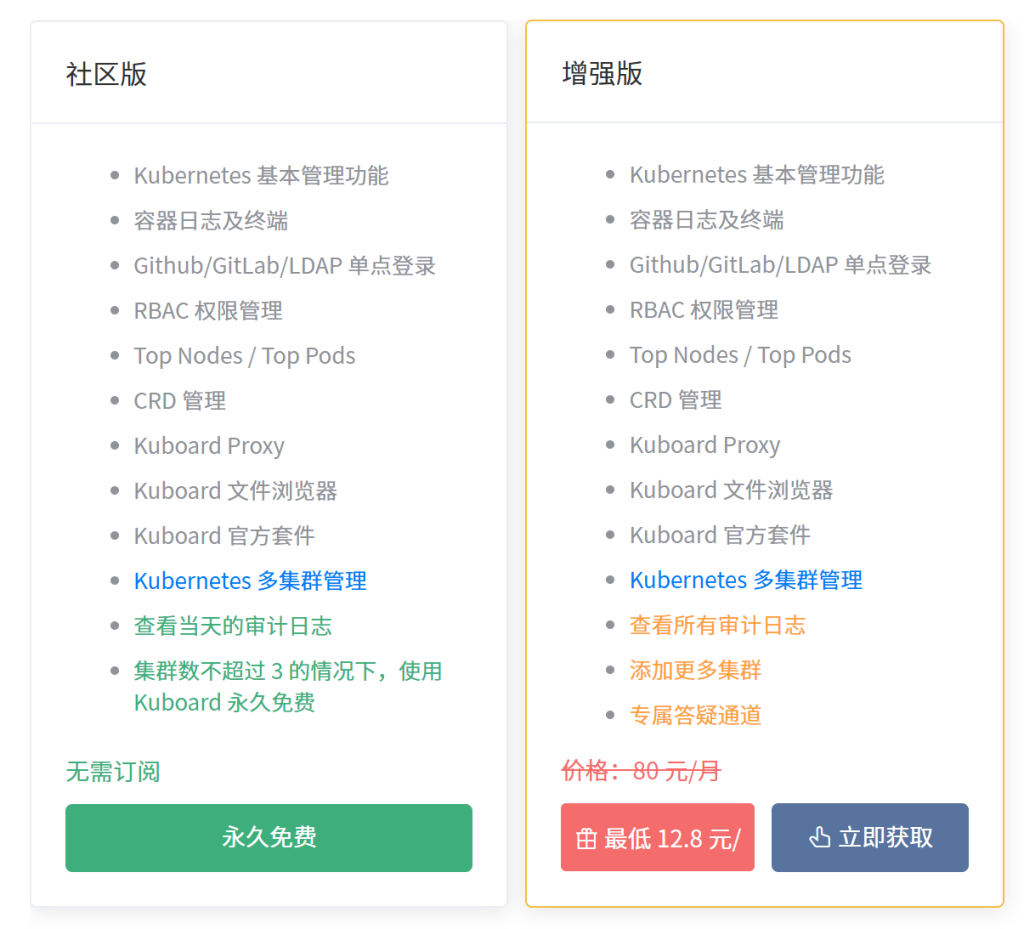
Kuboard 是一款社区版免费,但不开源后端 的 Kubernetes 管理工具,适用于开发和测试。Kuboard 提供了丰富的功能,结合已有或新建的代码仓库、镜像仓库等,可以便捷的搭建一个生产可用的 Kubernetes 容器云平台,轻松管理和运行云原生应用。您也可以直接将 Kuboard 安装到现有的 Kubernetes 集群,通过 Kuboard 提供的 Kubernetes RBAC 管理界面,将 Kubernetes 提供的能力开放给您的开发/测试团队。
Kuboard提供两个版本:社区版和增强版,社区版免费,增强版一年约为430元。
1.1 Kuboard安装
首先需要安装Docker
apt install docker.io -y在网管机上执行docker命令
sudo docker run -d \
--restart=unless-stopped \
--name=kuboard \
-p 10082:80/tcp \
-p 10081:10081/tcp \
-e KUBOARD_ENDPOINT="http://管理机内网IP:10082" \
-e KUBOARD_AGENT_SERVER_TCP_PORT="10082" \
-v /root/kuboard-data:/data \
swr.cn-east-2.myhuaweicloud.com/kuboard/kuboard:v3
# 请不要使用 127.0.0.1 或者 localhost 作为内网 IP \
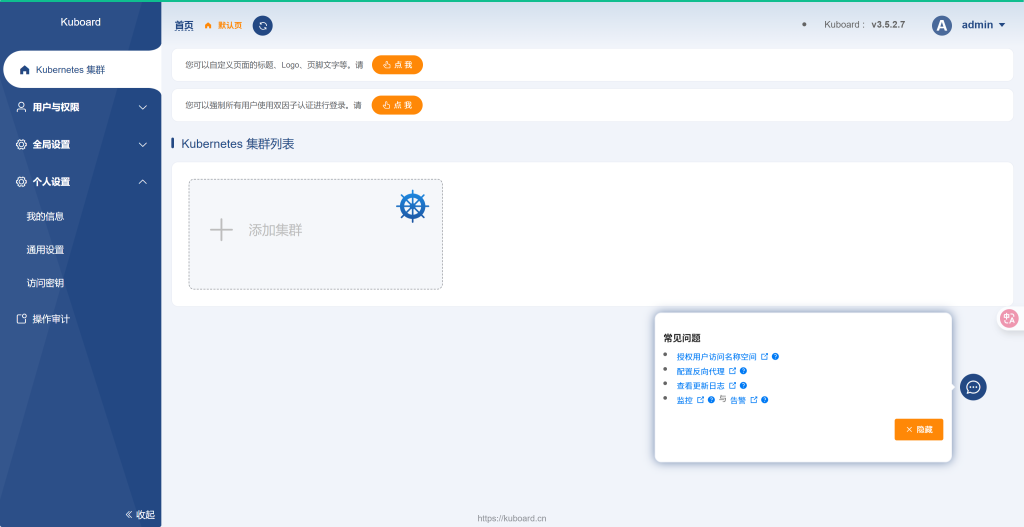
# Kuboard 不需要和 K8S 在同一个网段,Kuboard Agent 甚至可以通过代理访问 Kuboard Server \然后访问 https://10.88.88.76:10082/ (管理机IP) ,账户admin,密码Kuboard123
点击添加集群:
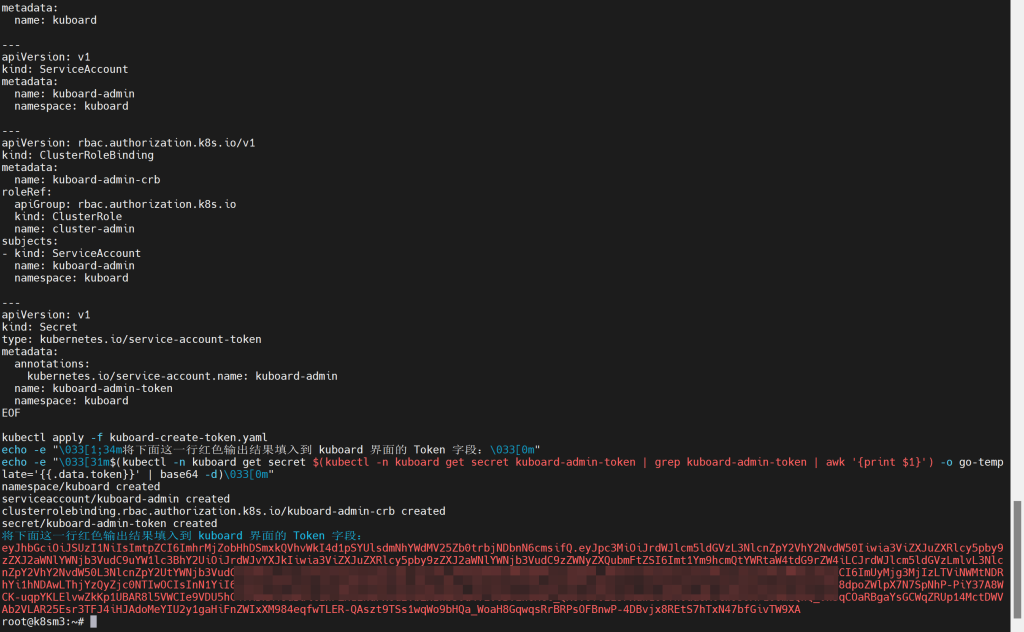
执行获取token命令
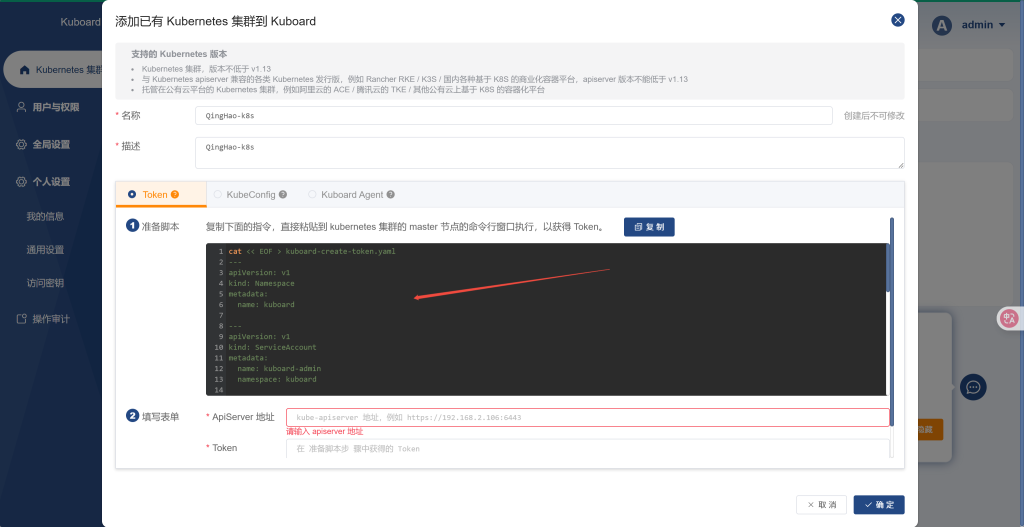
填写API Server 地址,填写VIP的地址:6443端口
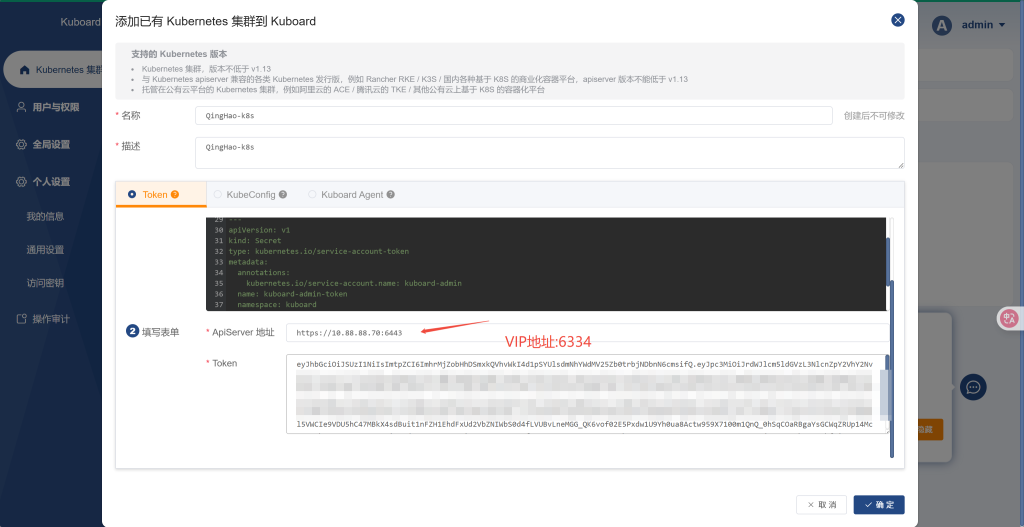
然后就可以看到集群的详细信息了

Kuboard具体使用指南可以访问:https://kuboard.cn/
2.rancher(适用于生产)
Rancher 是一个容器管理平台,专为在生产环境中部署容器的组织而构建。Rancher 使您可以轻松地在任何地方运行 Kubernetes,满足 IT 要求,并为 DevOps 团队提供支持。
2.1 Rancher安装
创建日志目录
mkdir -p /data/rancher/auditlog使用Docker安装(一定需要证书,否则后续问题很多)
docker run -d --restart=unless-stopped \
  -p 80:80 -p 443:443 \
  -v /data/rancher/ssl/_.procoding.cn.pem:/etc/rancher/ssl/cert.pem \
  -v /data/rancher/ssl/_.procoding.cn.privatekey.pem:/etc/rancher/ssl/key.pem \
  -v /data/rancher/ssl/cabundle.pem:/etc/rancher/ssl/cacerts.pem \
  -v /data/rancher/auditlog:/var/log/auditlog \
  --privileged \
  --name rancher \
  dockerproxy.net/rancher/rancher:v2.11.3
打开https://<服务器IP>/dashboard/auth/login
左下角可以切换为简体中文
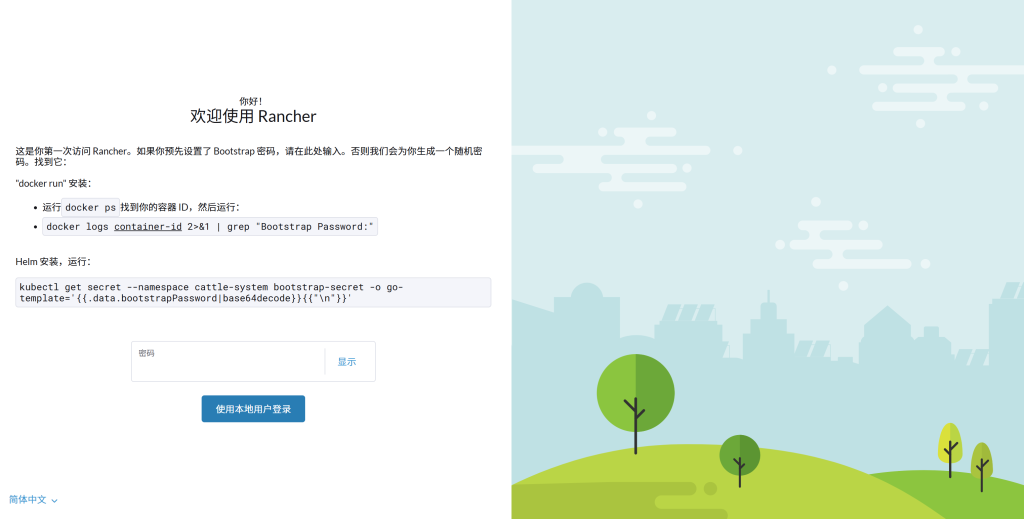
执行命令:
docker logs rancher 2>&1 | grep "Bootstrap Password:"
#系统输出
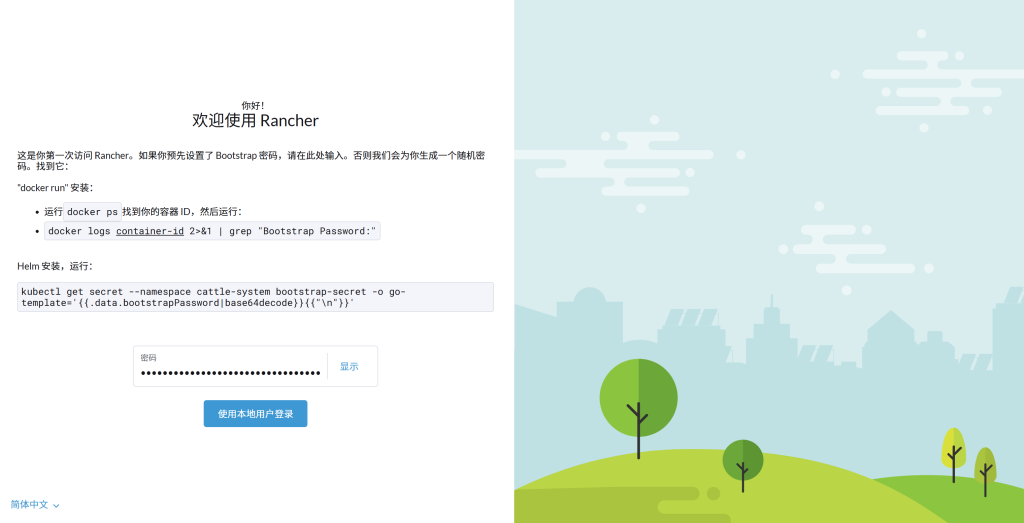
#2025/07/09 16:37:01 [INFO] Bootstrap Password: #l28q65kvf6xxxxxxxxxxxxxxxxjmhqnnx将获取的密码填入下面的密码框
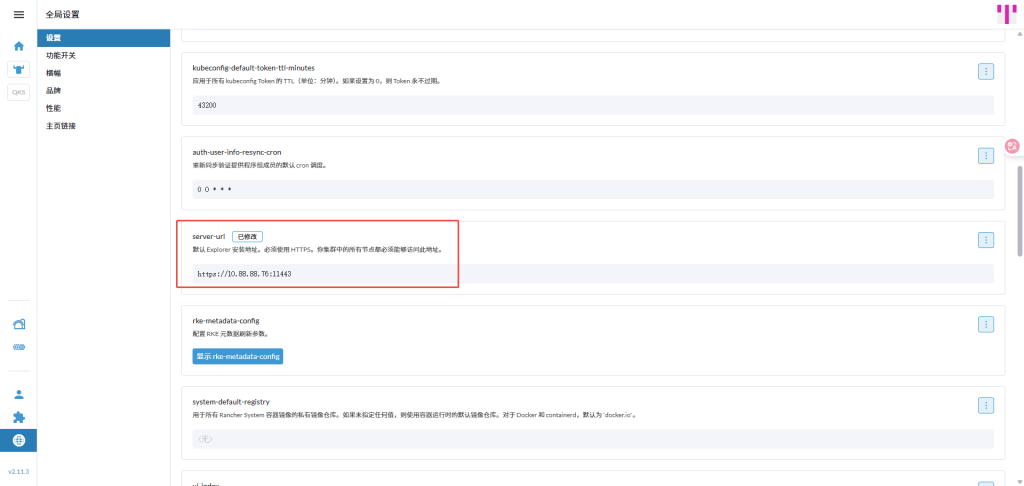
设置新密码(12字符以上),服务器URL建议使用域名。
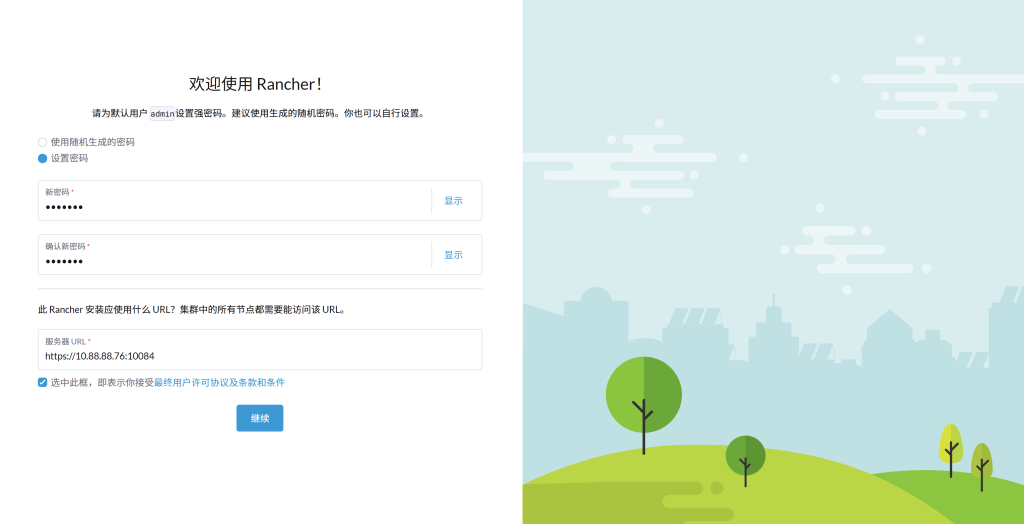
进入管理界面到全局设置——设置中,修改你的URL为你的域名 + 端口,否则后面SSL会出错。
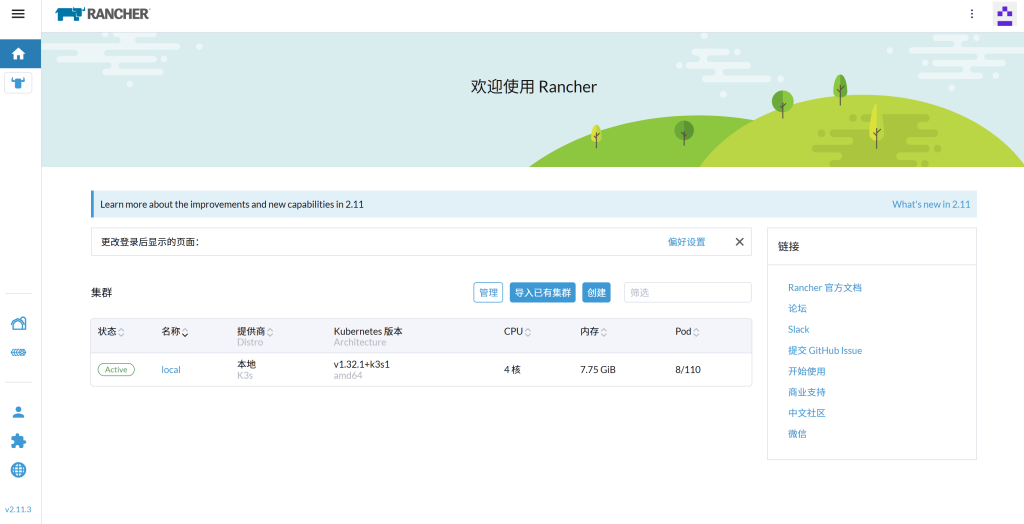
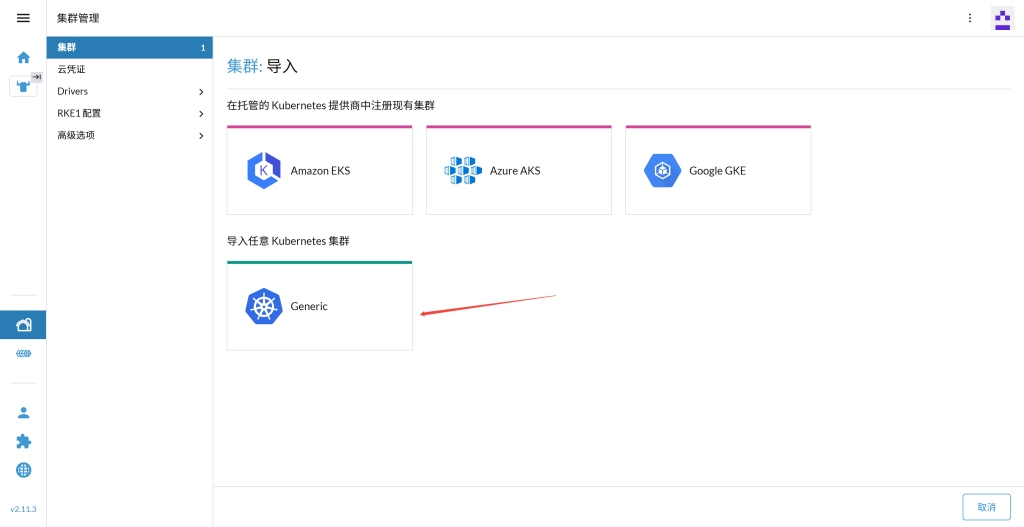
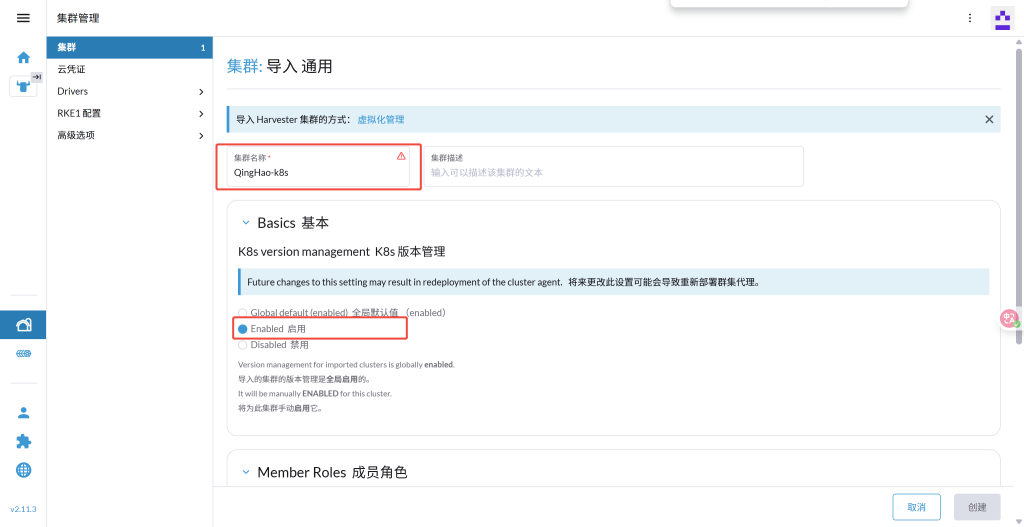
来到管理主页,导入已有集群
需要在master执行以下代码,但是由于我们在国内访问不了dockerhub,所以需要手动在各个机器上拉一下镜像。(或参考《REK2 搭建6节点K8S教程(三):RKE节点安装》文章中配置镜像代理)
/var/lib/rancher/rke2/bin/ctr --address /run/k3s/containerd/containerd.sock images pull dockerproxy.net/rancher/rancher-agent:v2.11.3

/var/lib/rancher/rke2/bin/ctr --address /run/k3s/containerd/containerd.sock --namespace k8s.io images tag dockerproxy.net/rancher/rancher-agent:v2.11.3 docker.io/rancher/rancher-agent:v2.11.3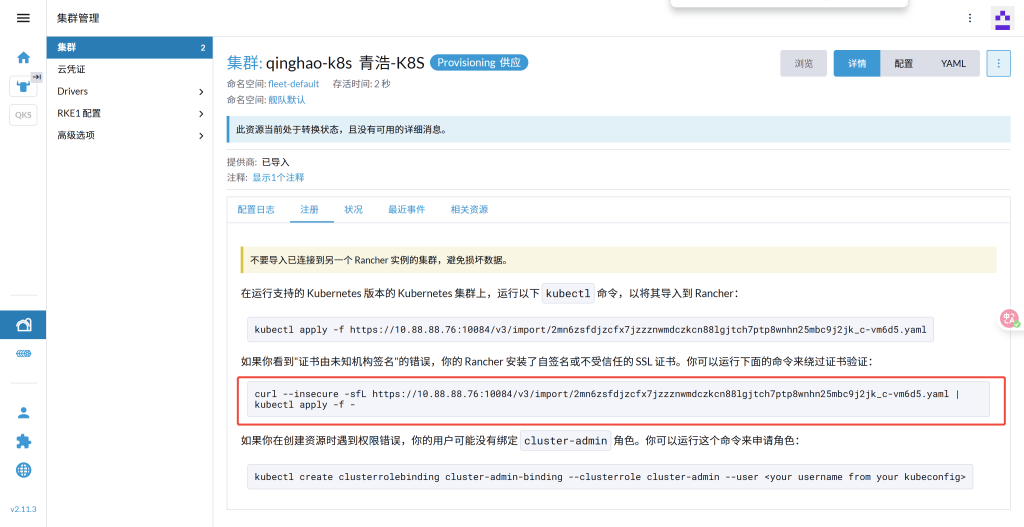
先执行下载
curl --insecure -sfL "https://<你的rancher IP>/v3/import/xxx.yaml" -o manifest.yaml

#执行apply
kubectl apply -f manifest.yaml

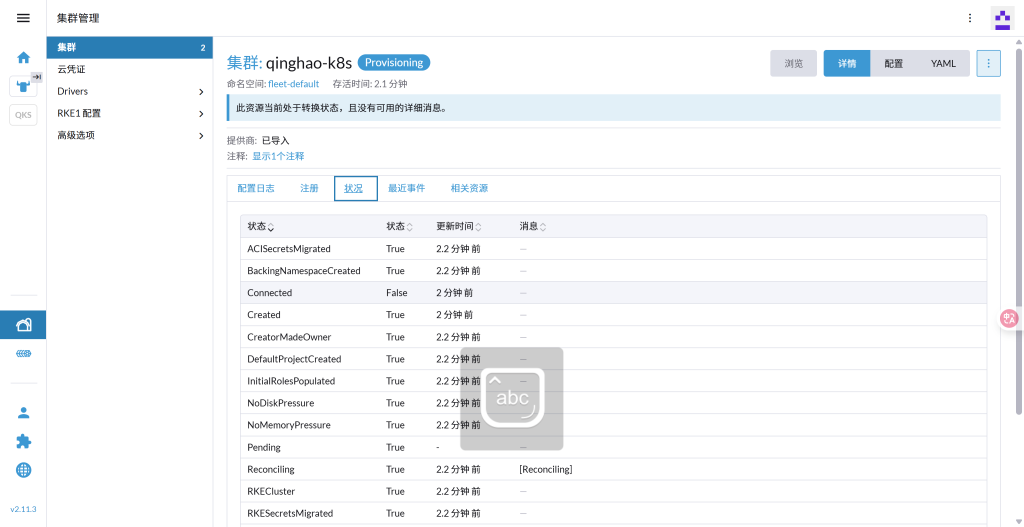
在状况里面可以看到构建进度。
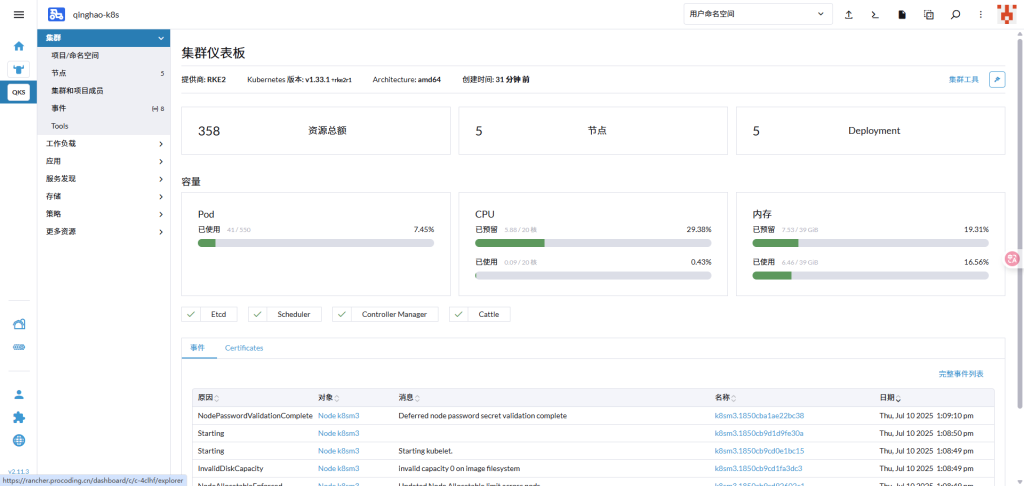
数分钟后安装完成:
Q&A:
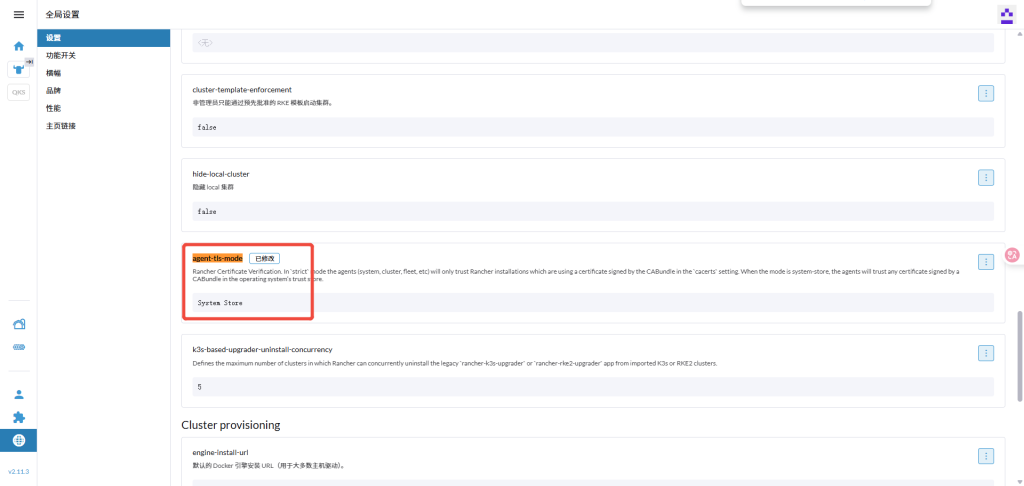
1. 在 Rancher v2.9.0 及更高版本中,agent-tls-mode 设置默认为 strict。这样会导致刚才创建的容器报错。

请导航到 Global Settings (全局设置 ) 页面,然后在页面底部附近找到 agent-tls-mode 设置,改为System Store。
2.Error from server (InternalError): error when creating “manifest.yaml”: Internal error occurred: failed calling webhook “rancher.cattle.io.namespaces.create-non-kubesystem”: failed to call webhook: Post “https://rancher-webhook.cattle-system.svc:443/v1/webhook/validation/namespaces?timeout=10s”: service “rancher-webhook” not found
删除指定资源即可
root@k8sm1:~# kubectl get MutatingWebhookConfiguration
NAME                WEBHOOKS   AGE
rancher.cattle.io   4          7d6h
root@k8sm1:~#
root@k8sm1:~# kubectl delete MutatingWebhookConfiguration rancher.cattle.io
mutatingwebhookconfiguration.admissionregistration.k8s.io "rancher.cattle.io" deleted
root@k8sm1:~# kubectl get ValidatingWebhookConfiguration
NAME                           WEBHOOKS   AGE
rancher.cattle.io              10         7d6h
rke2-ingress-nginx-admission   1          15d
root@k8sm1:~# kubectl delete ValidatingWebhookConfiguration rancher.cattle.io
validatingwebhookconfiguration.admissionregistration.k8s.io "rancher.cattle.io" deleted

ZFS Mirror vs mdadm RAID1:Linux 双盘镜像搭建、故障演练与性能实测
Read Article
GitLab CE搭建指南
Read Article